The Avalanche (AVAX) protocol has been in the spotlight for the last couple of months, alongside the rise of its DeFi ecosystem. In less than a year, the blockchain has managed to move into the fifth-place among blockchains with a DeFi ecosystem.
Want to discover this ecosystem? Let’s see together how to configure a Metamask wallet to access the Avalanche network.
What is Avalanche (AVAX)
Avalanche, just like Ethereum (ETH), is a smart contracts type of blockchain. The
foundations of the protocol were published by a collective of anonymous developers in 2018, on the IPFS file sharing protocol.
Down the road, a company was formed to operate the protocol and create this blockchain. Early 2020, an ICO was conducted to sell natives AVAX tokens to the protocol.
The Avalanche mainnet will be launched in the following months, in September 2020, along with the launch and distribution of AVAX tokens.

Like most smart contracts type of blockchains, Avalanche implements the Ethereum
Virtual Machine (EVM). In short, the EVM is the environment allowing smart contracts
code to run on Ethereum.
By natively implementing the EVM, Avalanche opens the door to all Ethereum tools and
developers. Thus, decentralized applications (dApps) wishing to migrate to Avalanche do not have to make any changes to their code.
For their part, users can access a rich DeFi ecosystem, while benefiting from transaction fees way much lower than those encountered on the Ethereum blockchain.
Avalanche ensures consensus thanks to a Proof of Stake algorithm. This is a classic choice for so-called next-generation smart contracts blockchains.
Avalanche’s ambitions
As you’ve got it, the Avalanche network is developed along two axes:
- Ensure the speed of transactions
- Ensure low-cost transactions
These two axes are direct responses to the problems experienced by Ethereum. So, where Ethereum is able to process about 20 transactions per second, Avalanche can process more than 4 500, which is more than 220 times as many transactions.
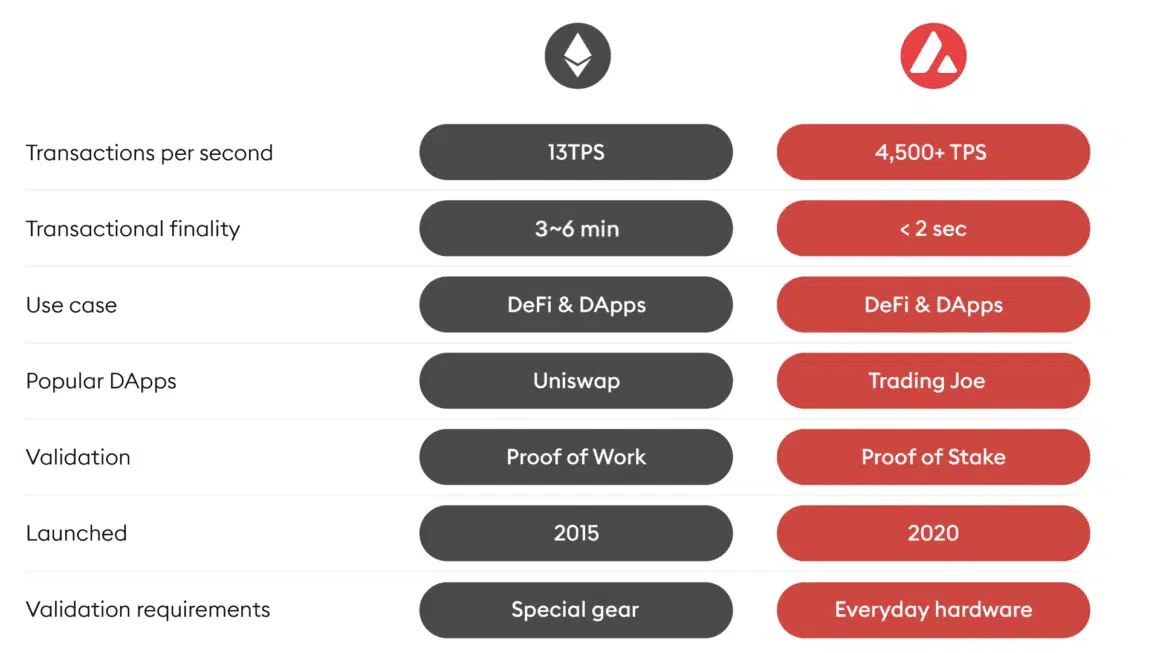
On top of that, Avalanche ensures a much faster transaction ending than Ethereum. Hence, while it takes about 3 minutes for an Ethereum transaction to be considered irreversible, transactions on Avalanche are almost instantaneous (1 to 3 seconds on average).
The average cost of a transaction is 0.00105 AVAX, or about $0.06, at the current market
price of 1 AVAX = $117. Interactions with smart contracts, such as a swap, cost about
0.00375 AVAX or $0.43.
The calculation is based on snowtrace.io data. With average gas fees of 25 nAVAX
(0.000000001 AVAX) a transaction that consumes on average 21 000 gwei will cost: 25 * 21 000 * 0.000000001 * 117 = ~0.06$.
Concerning the swap, the latter consumes on average 150 000 gwei and will cost 25 * 150 000 0.000000001 * 117 = ~$0.43.
Our dedicated article to understand how these calculations are made is available here.
Avalanche’s DeFi ecosystem
Like most smart contracts blockchains, Avalanche has largely taken advantage of the
significant congestion experienced by the Ethereum network to build a user base and develop its DeFi ecosystem.
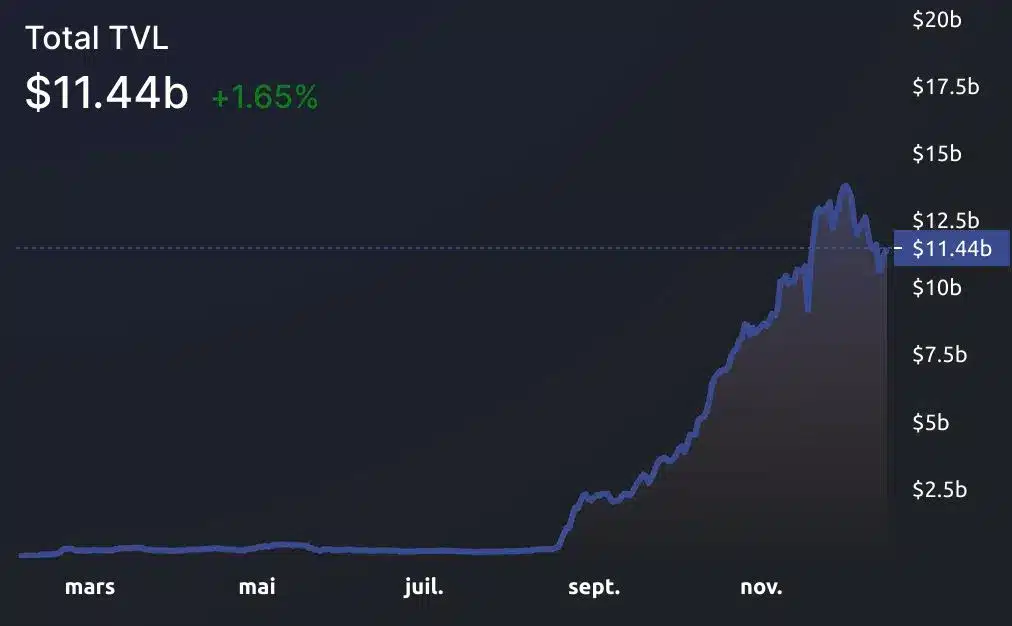
Thus, Avalanche recorded a stagnant TVL during the first half of 2021. However, from late
August 2021 onwards, this evolved quickly to finally peak at 13 billion of dollars in early
December 2021.
The Avalanche DeFi ecosystem includes several renowned platforms such as Aave, Curve or Anyswap.
However, it is to the decentralized trading platform Trader Joe that Avalanche owes a large part of its growth. Other protocols have also made a name for themselves, such as the earn-toplay game Crabada or the yield farming platform Penguin Finance.
Obviously, like any good DeFi blockchain, Avalanche also has its own NFT ecosystem.
Zoom on TraderJoe
As we’ve seen, TraderJoe is an emblematic application of the Avalanche network.
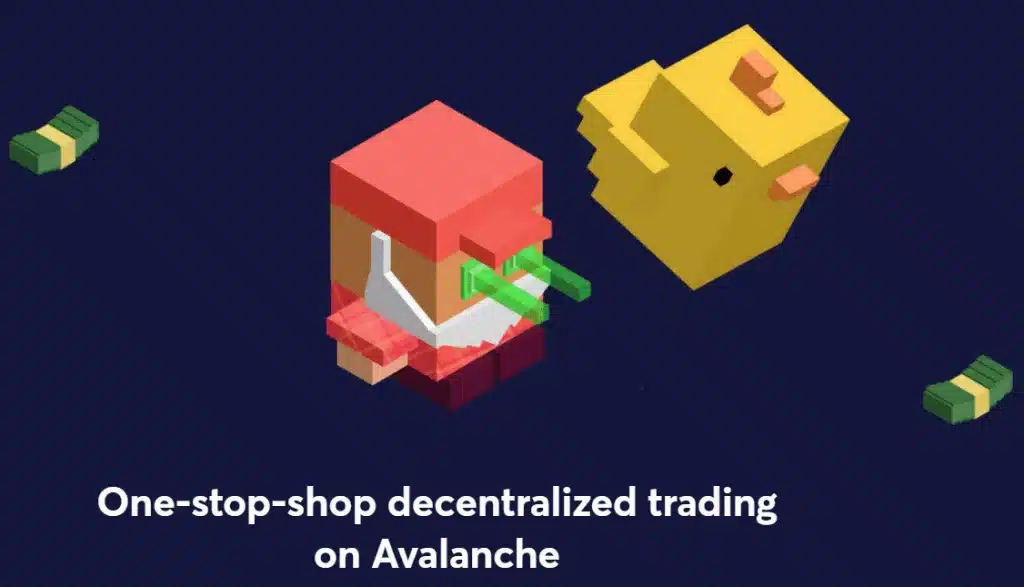
Practically, TraderJoe is a decentralized exchange of the classic AMM (Automated Market Marker) type.
To keep it simple, TraderJoe relies on market makers that we will call liquidity providers.
Thus, liquidity providers deposit assets in a given pair. For example, AVAX and USDC.
These funds are deposited into a smart contract, which we will be calling a liquidity pool.
Then, when a user wants to exchange his AVAX to some USDC, the protocol will take the
AVAX, deposit them in the pool and take the equivalent in USDC out of the USDC pool.
The user will pay a fee for this swap which will be redistributed to the liquidity providers to reward them for participating in the market.
In addition to this, TraderJoe has some farming pools, allowing liquidity providers to get more yield by staking their pool tokens (LP tokens).
Indeed, when you deposit some liquidity, the protocol gives you back a token representing your deposit. This token can in turn be staked on the protocol to increase the yield on the funds.
Configure the Metamask wallet for the Avalanche network
Metamask, the DeFi wallet
Metamask is an Ethereum wallet, developed by the New York-based company Consensys. It comes in the form of a browser extension and allows you to store your own crypto currencies (self-custody).
Metamask can also be configured to interact with other EVM-compatible chains. A feature allowing us to configure it with Avalanche.
Download of Metamask
First, we will need to get the Metamask wallet. To do this, we will go to the official website of the project: metamask.io.
Once on the home page, you will find a “Download now” button, which will allow you to
download and install Metamask on your browser.
Once installed and running, press “create wallet” and accept the terms of use. The software will ask you to enter a password, allowing you to unlock your wallet during your common uses.
Thereafter, the installer will guide you into the creation of a seed phrase. Quick reminder, the seed phrase is a sequence of 12 words that generate the private key of your wallet.
This key allows its holder to spend the funds present on the wallet.
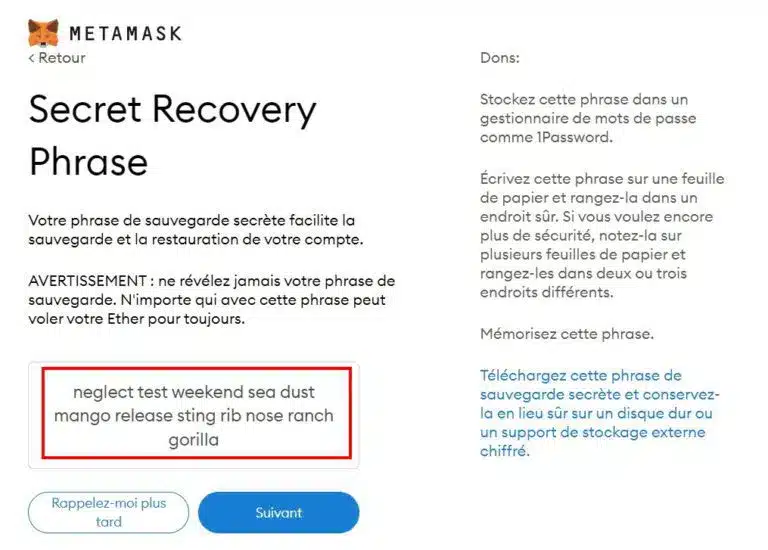
It is imperative that you keep it in a safe place, as it will be the only way to access your
funds in case of problems. Without this sequence of words, the money stored in the wallet will be lost forever.
We do not recommend storing it in a clear file on your computer. The ideal is to store it in a physical way and possibly in several copies located in different places.
Note: This guide works on computer and on the mobile version of Metamask. To use the DeFi applications on mobile, simply open the dApps on the integrated browser of Metamask.
Metamask configuration
Now that we have installed Metamask and that it is ready to use, we will be able to configure the Avalanche network. During its installation, the Ethereum network is configured by default by Metamask.
To add Avalanche, we’ll scroll through the list of networks by clicking on the “Main
Ethereum Network” drop-down menu at the top of the extension.

Once the menu is unrolled, you will have the list of networks already configured, as well as a button “Add a network” located at the bottom of the drop-down list.
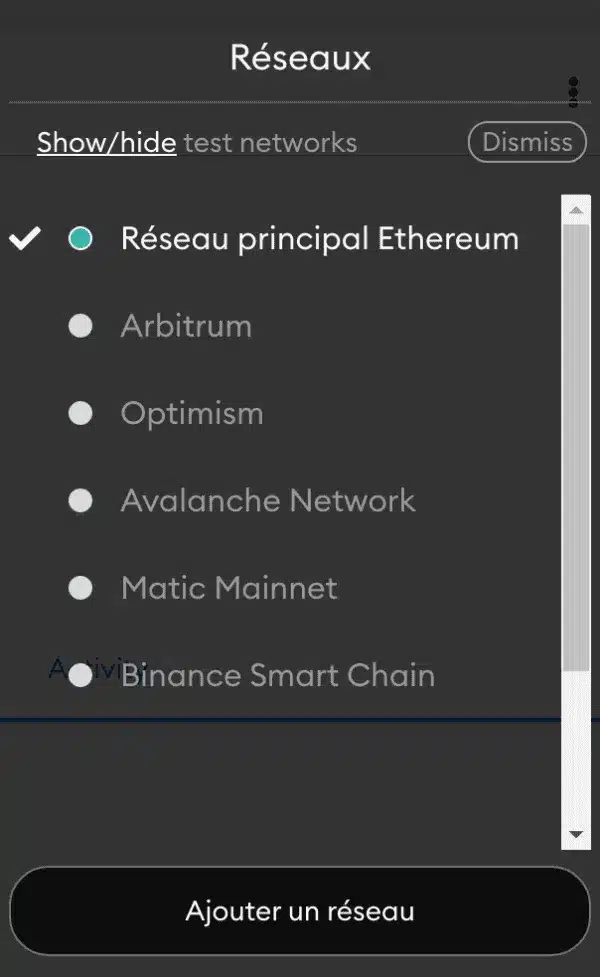
This will take you to an interface where you will have to enter the following information:
- Network Name : Avalanche Network
- New RPC URL: https://api.avax.network/ext/bc/C/rpc
- Chain ID : 43114
- Currency Symbol : AVAX
- Block Explorer URL : https://explorer.avax.network/
Once the information correctly entered, you can save. You will now have access to the
Avalanche network in the Metamask network list.
You can now enjoy the entire Avalanche DeFi ecosystem from your Metamask wallet.
Note: You can also automatically add the Avalanche blockchain from the Chainlist site by
connecting your wallet and searching for “Avalanche mainnet”.
Interact with Avalanche’s DeFi
Now that your wallet is properly configured, you will be ready to interact with the Avalanche DeFi ecosystem.
However, you will need to send funds to your wallet. To do so, you can send AVAX from the main exchange platforms such as Binance or FTX.
Make sure you select the Avalanche network as the destination network for the transaction. Once the transaction is completed, you will see your AVAX appear on your Metamask wallet.
You can then head over to the TraderJoe app and exchange these Avax against any other
cryptocurrency present on Avalanche.
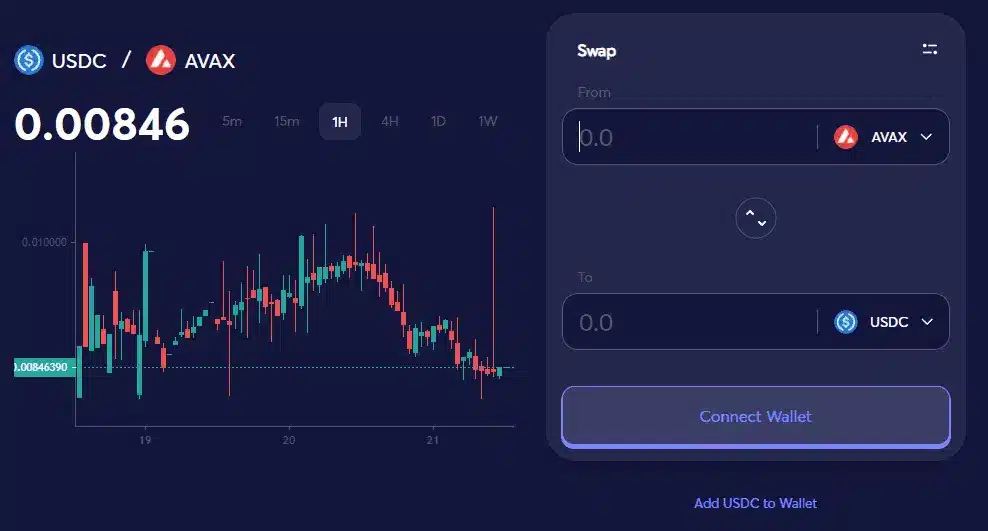
Once the amounts entered, you must sign, i.e., confirm, the transaction on your Metamask wallet. After a few seconds, your transaction will be added to a block and validated by the network validators.
There you go, you have just made your first swap on a decentralized application of
Avalanche.
Useful links
Snowtrace Gas Tracker : https://snowtrace.io/gastracker
Defillama Avalanche : https://defillama.com/chain/Avalanche